Pages

Sunday 25 December 2011

Merry Christmas to One and All!


Image Source: ... me! I drew this, ain't it cute ?

Well, it never fails to surprise me how the Christmas festivities just creep up on you - it's so weird, because even though it happens every year it just always seems inside of my head that the last Christmas was more than 12 months ago (I know maybe I'm crazy, but it just feels like longer).

Anyway, whether you personally celebrate Christmas or not - I think we should all embrace the spirit of goodwill to all mankind - so here's to good health and good fortune to one and all of you out there!


YouTube Video: Shakin' Stevens - Merry Christmas Everyone


P.S. Keep you eyes peeled for a special post from me on New Year's Day... as my little blog turns 1 year old, so I shall be celebrating this special anniversary with a GIVEAWAY (or two yay!). The giveaway details to follow... and it will be open to both UK and overseas entries :)

I'll be enjoying festive cheer with my family and in-laws when this post goes out, so wherever you area I hope you have a lovely time - remember it's not about gifts, it's about giving love and understanding :)

Wednesday 21 December 2011

Going Round The Bend...


Measuring Wheel - Kawaguchi Packet

Nope - I don't mean I'm going mad (although, what with it being Christmas it is turning into silly season trying to get all the festive chores completed in time for family trips etc. hohoho!).


I mean measuring round bends and curves! Following on from my last post about rulers that don't measure up I thought I'd mention where I bought my lovely measuring wheel from :)


I first encountered this particular product when Yoshimi held a giveaway (at the end of 2010 / beginning of January 2011 - I'm not sure of the exact date as the blog post is no longer there LOL), and I became a little obsessed with getting my hands on this lovely Japanese sewing gadget! (The lovely Melissa won that giveaway and her happy reports of using it only made my desire to purchase this notion even greater.) So I finally succumbed, and bought it this summer.

Basically, this small white plastic wheel has markings all around it's circumference from 0 - 20 cm, with fractional increments at every mm too. It's a revolving, rotary measuring tool that allows you to easily (and in my opinion) pretty accurately measure around curves 'n' bends - so perfect when you need to check the size of armholes (armscyes) and necklines etc. A great addition to my ever growing arsenal of pattern cutting tools!

Measuring Wheel (20cm Side)

One one side it's labelled 1   and is labelled 0-75 for 80 actual divisions, but I don't use that 
                                  4  side (I think it's to do with ¼ scale-drawings perhaps? Dunno!).

Measuring Wheel (Scaled Side)

It works in the same way that a 'trundle wheel', or a 'surveyor's measuring wheel' - which are used to measure distance (you might of seen your local council workers using them on the roads, and pavements of your home town sometime).

To use it...
You simply line up the 0-mark of the wheel carefully against the start of where you want to measure from.
Then, you roll or turn the wheel forwards and away from you.
Stop, at the point/end you decide - and make a note of the number on the wheel touching the end-point.
NB: If you are measuring a line longer than 20cm (which is the length of 1 full rotation of the wheel, i.e. it's circumference is 20cm), then just keep a note of how many times the 0-mark whizzes past. If it goes past 3-times, and the end-point of your curved line finishes on say 5.3cm against the marks on the measuring wheel, then the distance is:

(3 x 20cm) + 5.3cm = 65.3cm... s'easy!


Where to buy...
I got mine from a Japanese shopping site called Rakuten (apparently they are Japan's largest online retail marketplace) - it's a bit like Amazon marketplace, with lots of different stores selling stuff through them! Luckily, there is an English language version of their site (all my links below are in English - except where stated).

Manufactured by Kawaguchi
Manufacturer's Item 05-640  (商品番号 = Item 05-640)
Japanense name for the item is: マールサシ (Google translates this as 'Marusashi').
Seller / Store Name: Sanoya (あっと クラフト)
Link to Sanoya's Item/Product Page: Product Page
Price: *JPY 770 (*price I paid exc. Tax, and exc. Shipping)
Tax:  I bought 2 of the measuring wheels (so I have a spare one in case one broke - I thought it'd save me shipping/time in the long run) and my Tax for the 2x was JPY 76
Shipping Costs: JPY 180 (which was for 2 wheels) to the UK.
NB: To search for other stores selling this same item cut and paste マールサシ into the search box (or click here which gives you 2-stores). For more sellers in Japanese language only click here (for the Google translation here).

So, in total I paid for 2 wheels JPY 1,796 (approx. £15.00 GBP).
By my rough calculations, if you only wanted x1 wheel you'd be looking at (worse case scenario) around £9.00 GBP no more.

I use the XE Personal Currency Assistant to work out how much approximately items purchased from overseas will cost me.

But, you can ask questions of the sellers via the Rakuten site to check what your total costs might be, and here's their page on Delivery and Shipping Rates.

Rakuten also have sites aimed at other shopper's home countries wishing to buy from them in Japan: USA, Canada, United Kingdom, Australia, New Zealand, Singapore and France.

- - - - - - - - - - - - - - - - - - - - - - - - - - - - - - - - - - - - - - - - - - - - - - - - - - - - -
I decided to compare my lovely measuring wheel with 2 other methods I'd used in the past - dressmakers tape measure (on it's edge), and a flexible curved ruler. I drew a curved line onto some paper marked start and end points. The wheel gave me 12.25cm, the yellow tape measure 12.4cm, and the flexible ruler 12.15cm. Pics below:

Curved line on paper Measuring using flexible tape measure

Measuring using a flexible curved ruler Using the measuring wheel
- - - - - - - - - - - - - - - - - - - - - - - - - - - - - - - - - - - - - - - - - - - - - - - - - - - - - 
Alternative Wheels?...
I originally tried to find something similar to this tool in the UK (as I thought international shipping would cost too much).

Morplan sell a Curve Measurer (Product Code: 43895, £13.95 GBP + VAT and Delivery).
Image Source: Morplan.com

And, there are also 'Map Measures' (sometimes called Planimeters - although that can mean a very different type of measuring tool too) used to measure in scale distances shown in miles, kilometres and nautical miles - so I would've had to fiddle around with maths, and would've mucked it up no end I expect!


Image Source: Amazon.co.uk (shown is a Gelert model)

Or, there's even a pricey model by Alvin (Alvin 1111 2-Face Map Measure, Curve Measure, Plan Measure).

Frankly, they look way more complicated than the lovely simple Japanese tool - don't they ?


Thursday 8 December 2011

When Something Doesn't Quite Measure Up...

Self adhesive measuring tape
"A silvery, slithery, snake in the grass
perhaps? Or simply an inaccurate
peddler of measurements? Hmmmm..."

I'm still midst organising the new sewing room - and have been much distracted by a) a lack of lighting downstairs in our house due to an electrical fault (which is not good in the dark winter evenings, and it has taken up too much of our time on the weekends trying to fix it without paying £££ for an electrician to come out - luckily we managed to isolate the faulty part of the circuit and everything else apart from the kitchen now works again), b) trying to assemble a new garden shed + paint + felt it's roof + insulate it etc. etc., c) life in general and d) I transferred to a new job last week too ... phew! You get the picture - sewing has been on my mind, but not being actioned at all and my fingers are gettin' twitchy!

So, I decided to instigate a little drop of progress when I bought a self-adhesive measuring tape (approx. 150cm / 59" long) from MacCulloch & Wallis after work one day, for the princely sum of £1.95 (+ VAT). It's a silver coloured tape (polyester based I believe - it certainly feels very thin and not at all metallic despite it's appearance). I decided it would be very handy on the front edge of my cutting table (which is 150cm long from IKEA).

I cleaned off the surface for dust and grease (I swiped it with a dab of surgical spirit on a J-cloth to de-grease it and allowed it to evaporate off first to ensure good adhesion). I carefully applied the tape smoothing out bubbles as I went, and I took extra care not to apply to much stretch/tension on the end, so as not to elongate and distort it as I reached the end.
So, imagine my surprise when I saw this

150cm self adhesive measuring tape
What's not right with this picture? 150cm long table + 150cm tape measure... Answers on a postcard LOL!

Hmmm... see how on my 150cm long IKEA table (I checked!) the self-adhesive measuring tape seems to have stretched during the sticking down process and is too long by approx. 4mm?...

I considered lifting and reapplying it - but I thought it'd definitely not go down again so cleanly and would end up a nasty waste of time. So, I thought I'd check it against my fibre-glass based sewing tape measure (yellow). But, according to the yellow thing my table was 6-7mm longer than 150cm  - WHAT!?*!

Okay, by now I realised that one or both of the tape measures was inaccurate - so I compared them to some rigid rulers...

Comparing to my tape measure (at 20cm)

I comparing the (silver, at bottom of photo) self-adhesive measuring tape which I suspect is not accurate to the flexible tape-measure (yellow) and a rigid plastic ruler (45cm), and an aluminium metal ruler from the DIY store (100cm).

Attempting to line them up at the 20cm mark they are all pretty close - only the yellow one appears to be 1mm longer than the rest.

Next, I thought okay if the yellow 'n' silver ones ARE out of whack, then maybe it'll show up more at a greater distance (e.g. let's say the silver one was 1% too long - 1% of 10cm would be only 1mm, but at 100cm that's 1cm more - and easier to spot too).

Comparing to my tape measure (at the 100cm)

Comparing the tapes and ruler at the end of the 100cm aluminium ruler - the vertical clear ruler is aligned with the 100cm mark on the yellow tape-measure, but see how the yellow one seems a bit "short", and the self-adhesive tape (bottom) seems a tiny bit "too long" verses the aluminium ruler!!

Lastly, looking at the end of the table top...

Comparing to my tape measure (at the end)

Comparison at end of the (silver) self-adhesive measuring tape. The table is 150cm long, but the silver-coloured tape seems short! And yet, the yellow tape measure is also short - but by a different amount. Very odd! (NB: I carefully smoothed out the yellow one and held it in place lightly with sticky tape to get the photo.)

I have concluded that the self-adhesive tape and my yellow tape are inaccurate, and not to be relied upon for very detailed work - especially not anything over 20cm (haha). This got me a bit worried about some other rulers I have - but I checked those against one another and they seem fine (phew!).

Various rulers
A few of my rulers (I DO have more haha!)

I have heard that older fabric based tailors/dressmakers rulers were very prone to stretching and distorting - but that's not such a problem for the modern sewing tape measure (often made from fibreglass enclosed in plastic - like my yellow ones pictured many times above). So, my yellow ones shouldn't get any worse LOL!

I think the moral of this story is that a bad workman can't blame their tools if he/she doesn't check them first. Accuracy in sewing and pattern making is very important, and inaccurate rulers etc. could throw you off course without you even knowing. Imagine if you accidentally added 3mm to the edge of each seam allowance line on a 2-piece, A-line skirt zipped-up the centre-back - that could mean 4x side seam edges, plus (2x) either side of the zipper - 6x edges in total. 6 x 3mm = 18mm or approx. ¾" (that's assuming you didn't stitch it inaccurately too - which could compound the error eeek!). That's a big difference between a well fitting waistband or not!

Luckily for me, I don't plan to use the tape stuck on the table for accurate work. It's there to help me measure up approximate lengths of fabric / pattern paper / trims etc. and will save me time rummaging around for a tape measure when I need one :)

Friday 18 November 2011

I'm Going Non-Shopping Tomorrow... in Goldhawk Road


Ahhhh... it's nearly the weekend and the end of another working week draws to a close (I'm so tired, and need the rest *sighs*). So, I'm particularly looking forward to tomorrow morning when I shall be *non-shopping in the lovely fabric shops of Goldhawk Road/Shepherd's Bush market!

Image Source: By Sunil060902 (Own work) [CC-BY-SA-3.0 (www.creativecommons.org/licenses/by-sa/3.0) or GFDL (www.gnu.org/copyleft/fdl.html)], via Wikimedia Commons wikimedia.org
Yes, I am attending my **4th sewing blogger meet-up of the year LOL! I will be enjoying the company of the lovely Stevie of Beebee's Vintage Dress - as she is holding The Great November Fabric Excursion - she will be waiting for familiar faces and new ones at 11am outside of Goldhawk Road tube station in London on Saturday 19th November 2011.

So... if you know you are definitely coming to join Stevie for a sweet little sewing shopping trip please email her on: beebeesvintagedress@hotmail.co.uk, as it'd be handy to make a list of people she'll be waiting for.

Stevie will be outside of the station from 11am, and the group won't set off for the shops until 11.30am, but if you email her she'll send out a mobile number you can get her on if your stuck in traffic etc.  :)

See you there tomorrow!

For transportation, map 'n' directions to Goldhawk Road:
Here's a handy link to a download page for a PDF of the local area map of the Goldhawk Road / Shepherd's Bush Market area from TFL.
It might be useful for anyone travelling via public transport to the meet-up :)

Plus: Transport for London's Journey Planner and National Rail Enquiries Journey Planner, and one more.... walking directions for London WalkIt.com


*I am still trying to finish off tidying/DIY the last few bits of my sewing room - and I'm feeling somewhat guilty at the size of my fabric stash it's a wee bit uncontrollable (haha!) so my infamous floral shopping trolley will be staying at home this time. Therefore, I am allowing myself permission to purchase only x1 piece of fabric. (However, notions/trims are allowable 'cos they are 'ickle in size LOL!)

**My first 1st meet up of the year was during February in Walthamstow with snood-pusher Karen. The 2nd was in Brighton hosted by well-anchored Zoe and Beignet-wearing Stevie, and the 3rd was meeting cashmere-relovin' Elizabeth from SEWN.

Thursday 6 October 2011

Sewing Spaces... Slide-Out Under Table Ironing Board


Just seen this great pair of YouTube video tutorials by Made by Marzipan (I found them via BurdaStyle) for how to make:


Images Source: Made by Marzipan
Video: Slide-Out Ironing Board and her accompanying blog post

These are well explained, clear tute's all about how to make your own pull-out ironing board. Basically, it's a mini (well depending upon the custom size you make ;) !) ironing board that thinks it's a drawer! It is attached directly to the underside your table top - so it's there to use when you need to press something in a hurry. As it's on a pair of drawer runners it simply tucks neatly out of the way when you're not using it - brilliant! 

Having one of these under your sewing table next to your sewing machine/ overlocker (serger) will be very handy. I may just see if I can squeeze one into my new sewing room.

If it were me making this then I'd tweak it to suit my needs.

I'd keep both ends of the board square (and not cut off the corners). And I'd most likely use plywood ¾"-1" (18-25mm) thick instead of "real wood" as it's hard to find solid real wood in DIY stores here in the UK (that doesn't cost the Earth anyway!). I might even consider using 18-25mm MDF for the sides (rather than the 2ft x 4ft real wood suggested) as if you sealed the edges with white iron-on edging tape and then painted  - you'd get a much cleaner finish. I'd also add a single layer of cotton or wool wadding (batting) to the of the fabric board-cover instead of the silver-coloured heat reflective fabric used. Plus, if you made 2-covers at the same time you'd always have a clean one to use whilst the other one was in the wash! You could even make an extra cover out of medium-heavy weight calico (muslin) to use when fusing fabric with iron-on interfacing - that'd save you getting a sticky mess all over your pretty cover.

When I saw it posted, I was reminded of Kathleen of Grosgrain's July '11 Small Sewing Spaces cont post about a store-bought version.

Source: bhg.com via Grosgrain via Crystal on Pinterest

And, I commented back in July in Kathleen's post about ways I thought someone could DIY a home version (and now the tutorials above provide me with a road map to do so yay!) ...

Quote: ... made me immediately go and check out pull out ironing boards (and also wall-mounted fold-down ironing boards too). The ones sold online/in stores here in the UK range from £60-£100+ GBP($98-$164 USD) ouch!

I wonder if for the style in the picture you posted (the pull-out, drawer-style) something could be made DIY style at home? I.e. using full-extension drawer slides/drawer runners and a way to mount the top of a normal regular ironing board to the top of the runners? Perhaps the runners could be mounted to a flat piece of wood, and the ironing board attached to the wood? Or if the wood were plywood perhaps it could be covered in cotton batting/wadding and then with thick cotton fabric so that it became a pull-out pressing board - that way you could dictate the size of board you wanted to use?

I've just Googled and in the US 'Home Depot' have these full-extension drawer slides (2-pack) for $12.48 per pair (Model # D80616C-ZP-W, Internet # 202200643, Store SKU # 432668)

In the UK 'Homebase' has the drawer slides/runners in different sizes (eBay has them to of course!).

Friday 30 September 2011

Sewing Spaces... and my hitherto lack thereof


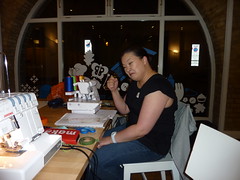
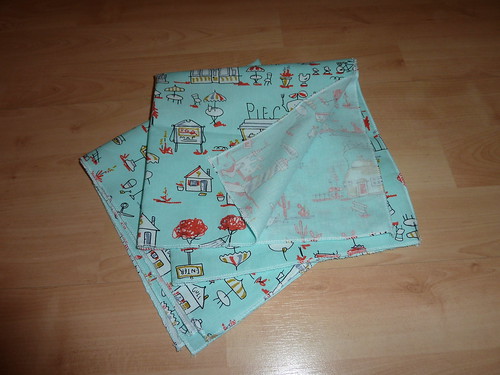
Since spring of last year when I rekindled my interest in sewing, I seem to have acquired a great deal of fabric, notions and other sewing related paraphernalia.

Storing my things in a ramshackle fashion crammed onto one shelf in our lounge cupboard was getting very messy. Not to mention that it was also a right pain in the derrière working from the dining room table. It was taking me way too much time to locate the things I needed from the cupboard before I could even get started. That, and the fact that I'd squirrelled away upteen number of books, magazines, buttons etc. all over the place - that sometimes I really didn't know what I had, or where it was!

The situation had become most, most frustrating :( !

But, back in April this year my lovely Hubby suggested that seeing as I loved to sew so much; and as I was making precious little headway on all the projects I was daydreaming about (and therefore achieving scandalously little output), that we should turn the spare bedroom in our house into my sewing room. [Oh, how I love that man!]

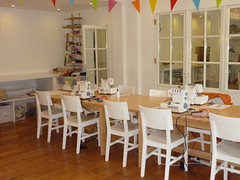
Yay! We decided that the room would be 80% sewing, and 20% home office - so in the future I could keep all my sewing gear in one easy to use, organised and accessible place. Plus, we could happily migrate all the office-y stuff from the lounge (think scanner, laser printer, hard-drives, laminator etc.) upstairs and free up some space downstairs too.

The upside is that we get a much, much tidier lounge and I get a sewing space all of my own, however... the downside is all the DIY and work it takes to achieve the dream (
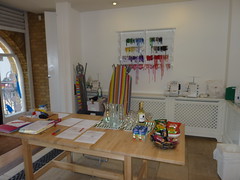
arrgghhh!). So, basically since April we have slowly been working on and off on creating my dream sewing space, and it's now 90% done!

It's taken a pretty bl**dy long time to get to this stage as I'd been beset with nasty colds - literally ill for 7-10 days at a time, with little sleep due to the coughing (I totted it up and realised I'd been ill every month for 4 months in a row at one point!)

Spare Bedroom - Old Colour Scheme   Sewing Room - Slowly getting there

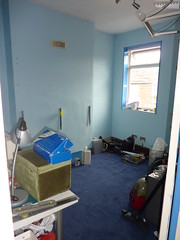
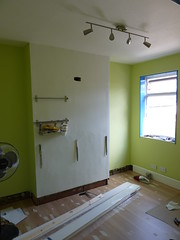
             LEFT: Old bedroom,             RIGHT: New colour scheme      

So, being the consummate hoarder that I am, I had to spend several weekends (which turned into quite a few months - boo!) de-junking the boxes of random possessions I'd been plonking into the spare room over several years worth of crap stuff. Loads went up into the loft, lots and lots to the local charity shop, some into recycling, and the rest to the council tip. (There's still a bunch of unwanted clothes 'n' stuff to go onto eBay, but that'll have to wait a bit now for when I have more spare time to photograph and list them etc.)
<br>
We drew up a long to do list:
(1) de-junk room of anything no longer needed
(2) empty room of everything in it (wiping the slate clean!)
(3) wire-in extra electrical sockets for power supply to machines/laptop etc.
(4) wire-in new telephone socket for broadband internet connection
(5) install new lighting overhead - spotlights
(6) replace carpet with new light-oak effect laminate flooring (easier to clean!)
(7) replace existing skirting boards for new
(8) shorten door to fit over new flooring, and re-hang with rising butt hinges (easier to take on and off verses normal hinges)
(9) replace curtain pole for roller blind
(10) add translucent frosting film to window (for privacy during daytime fitting - but with maximum daylight benefits!)
(11) add new window board/sill (we were missing one before opps!)
(12) repaint walls and ceiling (soft warm green all over, with a white chimney breast for photos!)
(13) paint all woodwork in brilliant white eggshell
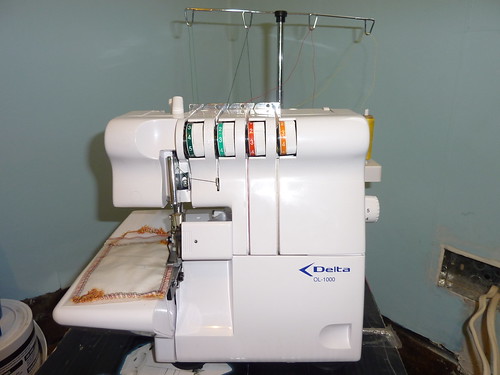
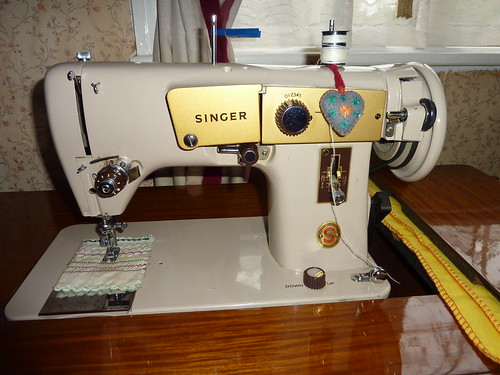
(14) sewing station - source a long table for sewing machine and overlocker/serger
(15) source small set of drawers to store notions/ tools (for underneath sewing station)
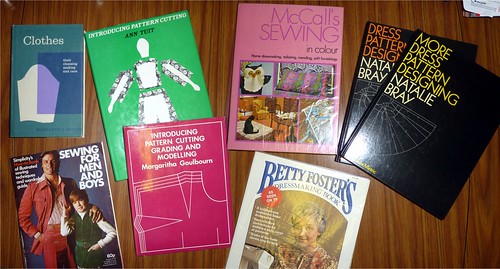
(16) install shelves for sewing library (books galore!)
(17) install shelves above sewing station (for notions/ tools)
(18) build fold-down cutting/ drafting table (wall mounted to save space)
(19) install tool storage area above cutting table (rails and hooks/ shelf)
(20) source tall bookcase for magazine/ pattern/ notion storage
(21) source and install mirror (for fitting area)
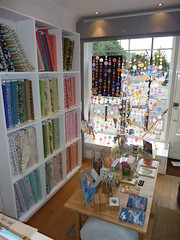
(22) source strong shelving system for fabric stash storage
(23) source small lightweight ladder (to access top shelves of fabric stash LOL!)
(24) make a large, portable pressing board (using ordinary ironing board as a base)
(25) install wall mounted storage for iron and pressing tools
(26) source set of matching boxes to organise and store items systematically
(27) source and install portable and adjustable task lighting over sewing station
(28) upgrade/ replace old filing cabinet from 3 to 4 drawers (for household bills etc.)
(29) relocate office equipment to room - computer/ printer/ scanner etc.
(30) finally unpack, organise and put away all that lovely fabric and notions!

I've only got the items left highlighted in pink left to do - hopefully get most of them sorted this weekend!


Some sources which have helped inspire my room makeover and DIY madness:-
• Fabulous book 'Dream Sewing Spaces: Design & Organization for Spaces Large'
ISBN-10: 0935278818 (, and I love this book. It is so well written and explained! It sparked soooo many ideas for me.)
Domestic Diva - 'Where I Sew – SEWING ROOM TOUR', and sewing room organisation series of posts (click on the homepage, and use the links in the menu on the right-hand side)
• Patty the Snug Bug's posts about new new sewing nook
Threads Magazine - web post 'What Makes a Sewing Space Great?'
Threads Magazine - 'See Sewing Rooms and Fabric Stashes on Flickr'
The Blue Gardenia's series of interviews with sewers around the globe about their sewing spaces
Gertie's post about 'The Near-Insurmountable Task of Organizing One's Sewing Room'
Tasia's space 'Step Into My Office'
A Costumer's Sewing Room
List of links to Real Sewing Rooms (NB: The original URL seems not to be working currently, so I've linked to the web archive of that page instead).

And now, my imagination is leading me to all sorts of fab ideas for patterns organisation, inspiration notice boards, thread storage, making my own pressing tools, ruler storage, projects-in-progress storage and much more! I'm pretty excited can you tell ;) ?

Wednesday 31 August 2011

'Sew Simple' - New Patterns by Simplicity... a short update


Image Source: www.simplicity.com

Just a short little post - but it seems like Simplicity have eventually remembered that they've produced this new line - and at $1.99 USD per pattern, the prices are pretty good! That's about £1.22 GBP at current exchange rates.

On the official UK site (selling both Simplicity and New Look patterns), the 'Sew Simple' section shows 70 styles currently on offer - each priced at £3.45 (which is erm, about $5.60... so getting on towards x3 times the price of the US website - boo!). The range offer Misses (grown-up ladies LOL!), little girls (but no boys), home decor patterns, soft toys, doll's clothes, bags and even a dog costume and coat!

Images Source: www.simplicity.com


<br>But there's only one solitary men's top... ahhh men you don't get much in the way of patterns do you :( ?

... 2 dog patterns to 1 men's is a very poor ratio indeed *sighs*!

Thursday 25 August 2011

Feel The Fear And Overlock It Anyway!


UPDATE: 11-Dec-2015 For anybody searching for an Instruction Manual / User Guide for the Delta OL-1000 Overlocker (Serger) machine, please check out my blog post here thank you :-).


04 Overlocker - Front
My 'Delta OL-1000 Overlocker' (Serger) straight out of the box new. (More pics here)
To paraphrase the Susan Jeffers book, I recently decided I ought to Feel the Fear and Do it Anyway when it came to learning how to use my overlocker!

I've been spurred onto this by a number of things:
a) I bought the darned thing before Christmas last year (errmm... hello it's nearly 8 months later and I've only taken it out of the box a measly once to check nothing was missing).
b) I've bought umpteen number of books + DVD on the subject of serging/overlocking
c)  Everyone else is diving on into the overlocking swimming pool with either first-time machines (Karen, Catherine, Patty, Tilly, Vicki) or replacement machines (Kristy). Whereas, I've not even dipped my toes into the metaphorical shallow-end - instead I'm doing a great impression of a water-phobic chicken :( !! 

So... after seeing Karen's post about her new Brother Overlocker, I thought it was high time to inflatable my armbands and leap get my feet wet. I dropped the lovely Karen a quick email, suggesting that the both of us as newbies to overlocking get ourselves onto a short evening class to learn the basics, like threading, tension adjustments etc..

So, this evening (technically yesterday evening, but I haven't gone to bed yet so whatev' LOL!) we met up at The Make Lounge in Islington where we had booked onto their short class, described as:


"  Overlocking Made Easy Class   
   •  Level: All
   •  Course length: One 2-hour session

With their ability to simultaneously cut and stitch a hem, overlocking machines are incredibly useful for decorating, reinforcing and constructing garments and other items. But they can be a bit intimidating!

In this 2-hour workshop, we’ll demystify the overlocker by teaching you how to thread, adjust tension and differential feed, and deal with corners and curves. You’ll leave the workshop with a pair of rolled hem napkins you’ve made yourself, in your choice of more than 100 gorgeous solid or printed fabrics! "

Now, the lovely thing is, I'd phoned them up last week to ask if we could bring along our own machines to the class (the answer was yes - I just had to remember to bring the power lead, and the manual). My reasoning was that even though they provide their own onsite machines for students, if I am new to all of this overlocking lark, then I want to learn the ins the outs, the tweaks, tips 'n' tricks on my own machine - afterall it is what I'll be using afterwards at home isn't it? So, I managed to lug my machine (I kept it in the box / packaging I bought it with for extra protection) all the way to work wrapped in one of my many trusty IKEA big blue bags that keep in the house (LOL!) to ward of the raindrops and stuffed into a strong trolley. Karen also decided wheelie-was-best, and brought her overlocker in a pull along suitcase (sensible lass!)


Image Source: http://www.ikea.com/gb/en/catalog/products/17228340
"Oh, IKEA FRAKTA bag... for 40p is there nothing awkward or heavy that you CANNOT carry ;) ?"

EDIT: If you are able to take your own overlocker machine to a class then:
a) make sure you take the pedal, power cable, manual and any tools/tweezers/extra needle plates/screwdrivers that come with it along with you too!
b) check the manual for how/where to adjust your differential feed (and check that the dial/thumbscrew will move - if like mine the thumbscrew won't budge at all, try some pliers at home before you attend the class to save yourself trouble on the night)
c) if at all possible forward a PDF copy (or a web-link to find it) to your teacher in advance. Then they can familiarise themselves with your model before you arrive, and be in the best position to assist you.

I didn't do b) or c) but Suzanne managed admirably. Though I think things would have gone easier for me if I'd done b), and I'm sure c) would've been useful to Suzanne too :). I photocopied the threading pages from my black and white manual and coloured them in to match my thread colours before the class - and that helped me loads with the threading :)!

The nice people at 'The Make Lounge' actually provide drinks and snacks for us - very civilized I must say! Plus, there were only 4 students in total on the night (the maximum they run with is 10) - so we had loads of time with our teacher to pester her with questions.


Outside of 'The Make Lounge' at Venue 2:
The Make Lounge - Craft Workshops (Venue 2 at 41½ Barnsbury Street) The Make Lounge - Craft Workshops (Venue 2 at 41½ Barnsbury Street)

Inside of our class room:
The Make Lounge - Craft Workshops (Venue 2 at 41½ Barnsbury Street) The Make Lounge - Craft Workshops (Venue 2 at 41½ Barnsbury Street) The Make Lounge - Craft Workshops (Venue 2 at 41½ Barnsbury Street)

And, here's their shop a few doors down on the same road (where we picked out our napkin fabric).
The Make Lounge - Craft Workshops (Shop/ Venue 1 at 49-51 Barnsbury Street) The Make Lounge - Craft Workshops (Shop/ Venue 1 at 49-51 Barnsbury Street) The Make Lounge - Craft Workshops (Shop/ Venue 1 at 49-51 Barnsbury Street)

The Make Lounge - Craft Workshops (Shop/ Venue 1 at 49-51 Barnsbury Street) The Make Lounge - Craft Workshops (Shop/ Venue 1 at 49-51 Barnsbury Street) The Make Lounge - Craft Workshops (Shop/ Venue 1 at 49-51 Barnsbury Street)


I'd decided to bring my own cones of thread with me in blue, green, red, and yellow. The colours to match the dials on my machine (which strangely don't tally between the machine itself and the manual, but that's a topic for a different post) - and I reasoned that I'd more easily be able to spot problems with tension and threading if I could discern which coloured thread belonged where :)
My cones of thread came courtesy of some eBay purchasing months ago (SEEEEE!! I WAS getting ready to do some overlocking hehe! I just hadn't gotten around to starting anything as yet ;)! )

Our fab teacher was Suzanne Cowan, Suzanne was a beacon of knowledge, calmness and light for us. (Plus, Chloe was pretty darn lovely too - opening up their store down the road to help us to select and cut our fabric choices for our napkins making.)
" Suzanne Cowan has been involved in both book arts and fashion design for over 10 years. As a bookbinder she has travelled throughout Canada, the United States, and Taiwan teaching bookbinding to people of all ages while maintaining an online store and gallery featuring her own book works. With a formal education in both textile and fashion arts, Suzanne is well versed in the art of fabric manipulation as well as fashion illustration, patternmaking, and garment construction and has sold her clothing at a variety of boutiques throughout Canada."

I had some trouble adjusting the tension on my machine for very light weight cotton samples (the class provided us with plenty of swatches for practice). And, with Suzanne's help I got it to work great doing a basic stitch on medium weight cottons. We worked out that my differential feed (adjustable on my model via a thumbscrew behind the looper cover) needed tweaking. However, as I'd not tested my machine before attending the course, I didn't know that the darned thing was stuck and I couldn't budge it for love nor money :( We even tried some jewellery pliers they had in the storage for other classes on it but no dice! I'll try again this weekend with the strong houshold pliers in our toolbox at home!! And, the needle-plate screw didn't fit my screw-driver *sighs* so I couldn't practice rolled-hems on my own machine, as I needed to change the plate to do it :(


Shaking my fist
Shaking my fist at my uncooperative overlocker

Here's a picture of my finished napkins :) I think they'll be great for a picnic in the park when the sunshine returns ;)!

Napkins
My finished napkins - complete with rolled hems!

So, as soon as the grand sewing-room makeover is finished (Hubby and I reckon by end of the 2nd week in September - fingers-crossed!). I shall try my hand at a simple T-Shirt, maybe one of these FREE patterns by pixelink on BurdaStyle which I've already downloaded and printed-off in readiness.

Batwing Top by pixelink
 
1 piece Kimono Tee by pixelink
So, I reckon that now I've broken the ice with my overlocker, I should hopefully very soon be making forays into the world of t-shirts, knits, and fabulously finished seams (yay  *with a big happy smilie face*!!)


P.S. I wantto give a big shout out to Michelle (thanks for playing tug-o-war with me and my trolley, to extract my machine from it's box LOL!) - I hope you find somewhere that'll service your Pfaff! And to Georgina (Georgia ?) I hope you get to grips with your Juki, if not sell her on eBay and upgrade to a nice shiney new model I say :)

Friday 19 August 2011

Part 2: Maybe It's Genetic?


Following on from my earlier post here part 1, this is the 2nd half of my post :)


Singer 224ML Machine
Mummy's Singer 224ML Sewing Machine

How Did Mummy Start Sewing?
Chatting with Mummy I tried to ask her where her sewing interests came from. And, truly it was the most enthusiastic I've seen her when talking about any topic EVER! I found out that she started sewing in the 1960's when she was 14 years old, she enjoyed admiring the fashions of older girls and ladies, but could not afford to buy things for herself in the shops (she was the youngest of 11 children, so I imagine that spare cash for the idle fancies of the young and fashion-concious was not readily available!). She had an urge to make for herself a dress with a fitted bodice, nipped in waist and full gathered skirt. But, that kind of style takes a lot of fabric to achieve. So, she bought some cheaper bedding fabric, plus having only a 19"/48.3cm waist at the time (Mummy is 'ickle - only 5ft 1inches/155cm tall) she had enough fabric to accomplish her aim. She didn't use a pattern - she just winged it, using her older Sister's sewing machine! The result came out so well, that her next door neighbour upon admiring her brand new handywork commisioned Mummy to make some pretty dresses for her two young daughters (who, if I understood correctly from Mummy were about 5 and 7 years old at the time). The neighbour supplied the fabric for the dresses, Mummy supplied the thread - and she was rewarded with a payment of some "proper" dress fabric. Pleased with this turn of events, Mummy realised that if she took on other projects she could earn enough money to buy her own sewing machine. So, she made things for people in her neighbourhood - and used that money to take evening dressmaking classes to improve her skills, and to buy her Singer 224ML sewing machine. A friend of hers was a photographer for a local paper, and his girlfriend asked to pose with her for the photo you see below left. Mummy made the blouse and skirt from her own self-drafted patterns. Turns out she never wholly liked anything worn by other people, and sewing helped her to stand out in her own individual style, and "To be different; unique". She liked to mix and match elements from other garments she saw in magazines or on the street. The picture on the bottom right shows Mummy at 19 years old (did the eyebrows man ;)!) still with the 19" waist in a self-made, self-designed dress at a fashion show. Mummy says that models back then often worked on shows say modelling just a line of coats, or something else and that they were expected to provide the rest of the clothing (and makeup/hair) themselves. So, she made her own!

Mummy 14 years old Mummy 14 years old Mummy 19 years old
Mummy in her self-drafted, self-made garments.

After her initial start into sewing at 14, Mummy, took on four part-time jobs at the same time! Modelling, Perfume Sales Lady at the Robinsons department store, wedding make-up for brides, and of course dressmaking. Ten years of saving up her hard earned wages later, she had enough capital for a sizeable deposit to purchase her own flat. And, a couple of years after that she trade-up for a bigger and better place. (NB: Mummy met and married Daddy in her 30's, so was pretty much an independant lady before she settled into married life and babies etc., and they did ship her sewing machine over from Singapore to the UK when they married)

It's funny - I can remember Mummy making me 1 or 2 things when I was little. And, she made my two brothers some matching waistcoat and trousers each (along with neck ties). But, I can't ever seem to remember her making things for herself - I guess having 3 small children all under the ages of 6 at the same time must really eat into your "Me-time". I do distinctly remember that we were never allowed to go near her sewing machine - and (see photos from my Flickr account below) it was always covered in many layers to protect it from dust, scratches, and sticky children's fingers (haha!).


I asked Mummy when was the last time she made something from scratch, and she wasn't very clear - but she did say that for my youngest brother's recent wedding (this April) she'd taken in a jacket all along the sleeves and down the side-seams because she likes the big 80's shoulder-pad look of the bigger sizes, but not how baggy they are on the body.


So, whilst I don't think we'll be setting up a wee sewing circle of just us two stitching-buddies anytime soon - it does somewhat intrigue me as to whether my obsession love of all things sewing comes from her, is it nature (hence the genetic of the post title) or nuture LOL :)? 

Part 1: Maybe It's Genetic?


This is a 2-part post: see the second half here.

Last weekend we went visiting to my Mother's house. It was a flying visit, so we didn't stay long (we were on our way back from a day-long visit to one of my brother's house nearby).

So, I was lingering in Mummy's dining room and as I was idly scanning my eyes over her bookshelves I spotted some sewing books. Now, Mummy and I have never had one of those archetypal, stereotypical Mother-Daughter relationships that families are supposedly meant to follow. [For which read: we have generally never gotten on, we are civil but not overly friendly, and we have never bonded over anything. I have no special memories of time spent/family events/occasions/touching moments during my childhood, teenage or adult years that involve my Mother - although there are many happy times with my Father, brothers and the rest of my family. Basically, as the old adage goes "You can choose your friends, but you can't choose your family" - and whilst there is no animosity present, we just don't hang out or anything like that.] So, you can imagine my surprise when I came across these alluring tomes! Had these tantalising vintage sewing relics been in my midst during my formative years; when sewing did not draw my attention in the way it does now, then maybe my pleasureable pastime might have come to fruition much sooner LOL! (Back then it was merely a useful tool when I wanted to crop some jeans into shorts, or hem a skirt bought in the local Oxfam for £1.50 I made 2 dresses that I recall, and not much else.)

Anyway I digress! So, I HAD to take some pics of course ;)!

The first two books that I pulled off of Mummy's shelves were by Adele P. Margolis (and spookily enough I already own copies of these very two titles myself):

01 Mummy's Sewing Books

Design Your Own Dress Patterns by Adele P. Margolis (1971)
ISBN 0263516741, Original cost £3.85
(I have the re-issued 2006, paperback edition now titled 'Make Your Own Dress Patterns', ISBN
0486452549).

How to Make Clothes That Fit and Flatter by Adele P. Margolis (1969)
ISBN 0385090641, Original cost £UNKNOWN.


I thought that was the lot, but as I put the Adele's back, I spied at the end of the very long shelf some more reading-marevls!

02 Mummy's Sewing Books

Clothes - Their Choosing, Making & Care by Margaret G Butler (1965)
ISBN 071342700, Original cost £UNKNOWN


Sewing for Men and Boys by Simplicity (1978)
ISBN 0918178002, Original cost £0.60

Curiously, Mummy seems to own a UK edition (it has 60p printed on the front cover). However, online I can only seem to find the US edition with $1 on the front. Flicking through Mummy's copy I've realised that the photo on the cover is different between the different countries.

Introducing Pattern Cutting Grading and Modelling by Margaritha Goulbourn (1971)
ISBN 713427108, Original cost £1.90


Introducing Pattern Cutting by Ann Tuit (1974)
ISBN 0435428608, Original cost £2.80

Betty Foster's Dressmaking Book (1979)
ISBN 0356063198, Original cost £1.25

McCall's Sewing in Colour (
(C) 1963, Impression 1977)
ISBN 0600024571, Original cost £2.95

Dress Pattern Designing by Natalie Bray (1974, 4th Edition 'Metric')
ISBN 025896944X, Original cost £UNKNOWN
This is the link to the current, modern 2003 Edition.

More Dress Pattern Designing by Natalie Bray (1974, 3rd Edition 'Metric')
ISBN 0258969725, Original cost £
UNKNOWN
Again, link for the latest 2003 Edition.

Tucked inside one of the books was a pink and white packet of Betty Foster's Dressmaking Design Paper. It's large paper, printed with squares, and the idea is that you use a smaller diagram of a pattern and transfer by hand all the lines, and curves onto the larger squares of the 'design paper' - thereby keeping everything in proportion to the scaled-down smaller diagram. (On a side note, it even looks like the company Betty set up to sell her products is still up and running in Crewe.)

More pics are in my Flickr photo set of the books here.

Please see my next post about How Did Mummy Start Sewing? for more!